Getting Started: Dungeon Flow Basics
Now that we've created a basic room Tile and added Doorways, it’s time to give DunGen instructions on how to assemble those Tiles into a full dungeon.
This is where the Dungeon Flow system comes in.
Marking the Tile
We need to add a Tile component to the root of our room (Add Component > DunGen > Tile). This component provides information about how DunGen should handle the tile. For now, the defaults are exactly what we need.
Our tile GameObject now needs to be turned into a prefab. Drag the GameObject into a folder in the project window just like we did with the doorway.
Before DunGen can use our room, we need to mark it as a Tile.
- Select the root of your room GameObject (e.g. "BasicRoom").
- Add the
Tilecomponent:
Add Component > DunGen > Tile
The default settings will work just fine for now.
Now turn your room into a prefab by dragging it into a folder in the Project window—just like we did with the Doorway earlier.
Setting Up Assets
DunGen uses a few asset types to define how dungeons are generated:
-
 Tile Set
A collection of Tiles to choose from at random
-
 Archetype
A type or “biome” for a dungeon section
-
 Dungeon Flow
The master graph that controls structure and progression
Let’s create each of these now.
Tile Set
Right-click in your Project window and choose:
Create > DunGen > Tile Set
This asset holds the list of prefab Tiles DunGen can randomly choose from.
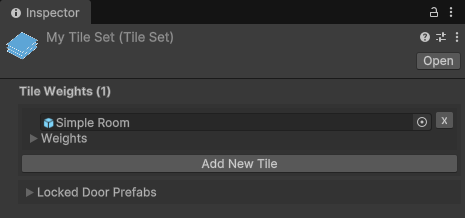
We just need to assign our tile prefab to the newly created tile set. With the Tile Set selected:
- Click Add New Tile, or
- Drag your Tile prefab directly onto the button
Archetype
An Archetype represents a segment of the dungeon path that allows us to have distinct sections. We could use these to create biomes (e.g. castle, graveyard), but we'll only need the one for this tutorial.
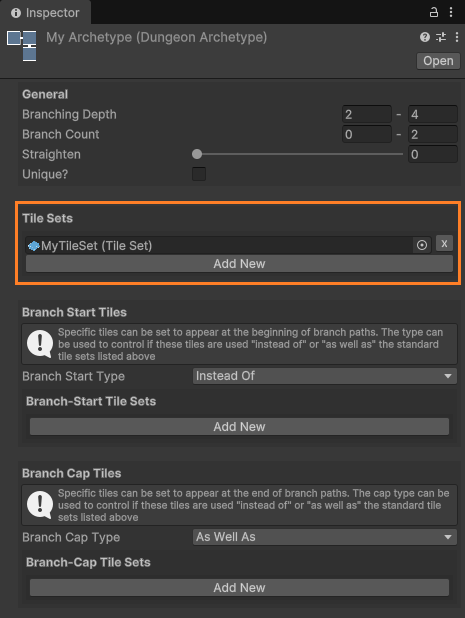
With the Archetype asset selected:
- Click Add New under the Tile Sets section, or
- Drag your Tile Set onto the button
Dungeon Flow
We have one final asset to create: the Dungeon Flow that ties everything together.
Right-click in the project window once again and select:
Create > DunGen > Dungeon Flow
This asset has a lot of options, but for now we're only concerned with the flow graph. With the dungeon flow asset selected, click on the Open Flow Editor button in the inspector and you will be greeted with the basic default graph containing just a Start and a Goal node, with a single line connecting them.
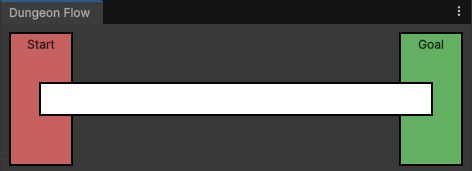
The default dungeon flow graph
Understanding the Flow Graph
Nodes
Nodes (such as Start and Goal) on the graph represent a single tile. Click on one of the nodes to edit it in the inspector. For now, we'll just add our only tile set to the list for both the Start and Goal nodes.
Later, we might decide we want a specific tile at the beginning and/or end of the dungeon. This would be the place to do that. In future tutorials, we'll also look into adding additional nodes, allowing us to place specific rooms such as boss rooms that need to appear at certain points along the main path.
Lines
Between the nodes is a single line and clicking on it reveals a simple list of archetypes in the inspector. As before, we'll assign our single archetype asset to this list. DunGen will make a path of random tiles between the two nodes connected by this line. In future tutorials, we'll split this line segment into multiple biomes.
Dungeon Length
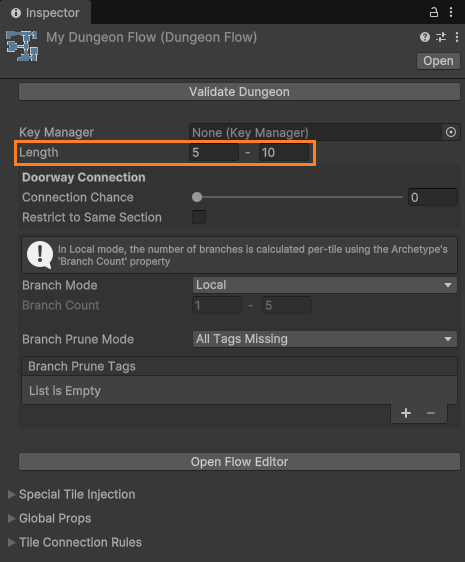
The overall length of the dungeon is not determined by the graph, and is instead set inside the Dungeon Flow asset as a range of values.
Based on these numbers (and taking into account any nodes in the graph), DunGen will automatically calculate how long the line segments in the flow graph should be.
Recap
You should now have three new assets in your project:
- A Tile Set with your room prefab
- An Archetype using that Tile Set
- A Dungeon Flow with a basic two-node graph
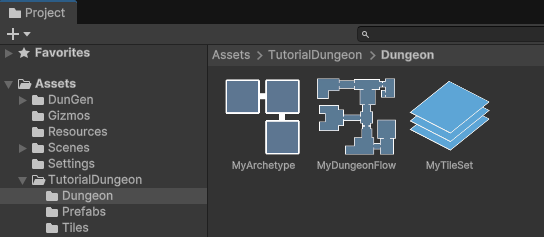
All the assets we've created
Dungeon Validation
To ensure we didn't make any mistakes along the way, we can validate the dungeon by selecting our Dungeon Flow asset and pressing the 'Validate Dungeon' button in the inspector. A message will appear in the console letting us know if any issues were detected.
If you don't see the console window, go to Window > Panels > Console to open it.
All that remains is to generate the dungeon layout, which we'll be doing in the next section →